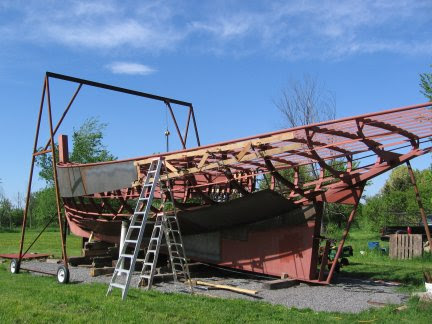
Starting by the keel
Even though no jobs on the whole project are quite the same, we do pick up tricks at each step that help with the next. It is good then, when it is possible, to start by the easiest and end by the harder tasks.
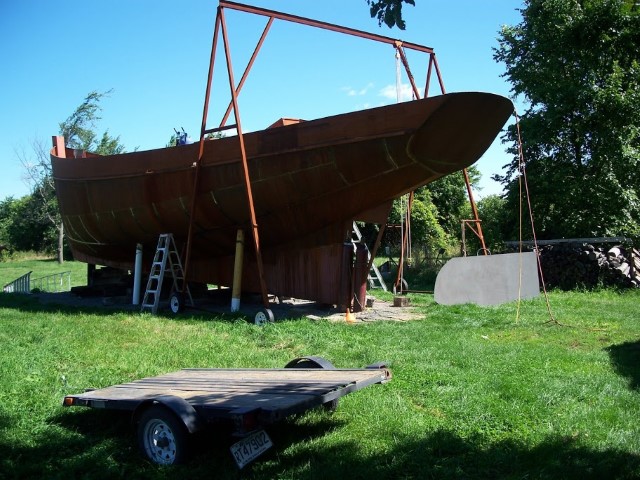
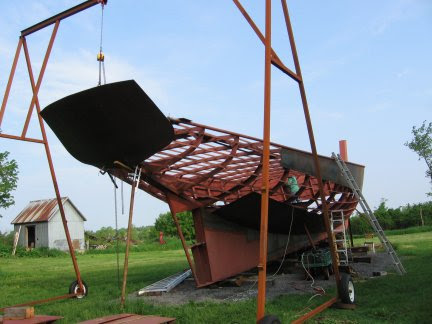
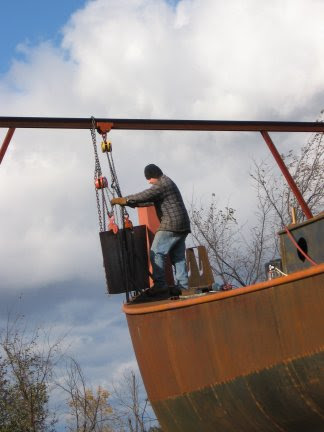
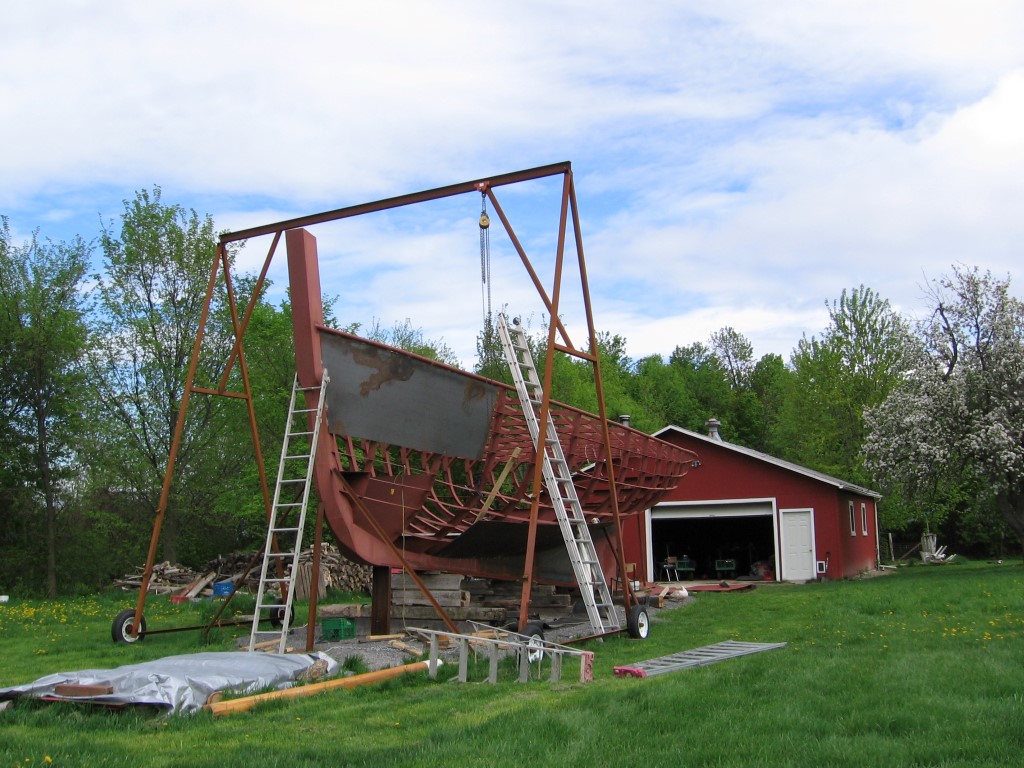
The plating started on the keel, I appreciated starting by flat, easy to trace surfaces. I got to warm up my hands with the plasma cutter on strait lines and find out how to move plates around with not to big of pieces. Getting the keel fully plated and welded up before plating the rest of the hull also allowed us to fill it with lead from ground level.

Plating order
It was tempting to start by the deck as it was obviously the easiest plating to be done. For the same reason as we placed the deck longitudinals in first (locking the frame) we considered starting there, but we also considered the benefit of having a top open to lift plates into place with the gantry. So the deck would be last.
Next question was if the round chine was to be plated before or after the upper and bottom plates. We opted to keep it for the end. First and honest reason, I was so scared of plating the round chine I was happy to justify some procrastinating. Better reason: having the other plates in place would give more edges to fasten the round plates that we were to force into place.
The stern plate had to come in before any plate reached the back as it was easier to trim six small edges to one long than the long side edges of the stern to the six small ones. I may not explain myself so well, in clear: it seemed much easier and logical like that.
Seems like we started by the bottom and top plates….
Templating
Before templating we had to define our edges. For each plate the edge matching the round plate is not obvious but we need an edge to template against. On each rib I made a mark where plates meet and then tacked a 1/2 in square bar along the marks, the square bar worked as a batten defining the missing edge.
For the templating we used some 4 inch strips of 1/4 in cheap plywood chopped at varied length. Picking the accommodating length we would clamp strips to the boat following the inside boudaries of the plate to be. Being too close to the edge would not be helpful, we are not trying to get the exact shape with the plywood. At first, spring clamps are holding the template together, when we are satisfied with the position of everything we get the hot glue gun out to work and glue the strips together without taking anything off the boat.
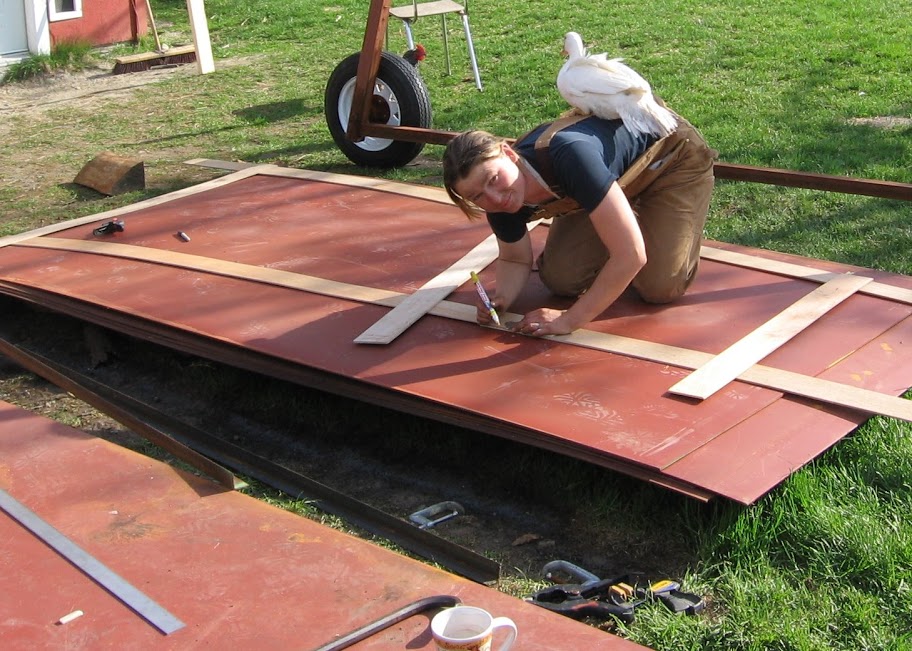
Down to step two of templating, taking marks along the boundary of the plate to be. How to explain this clearly? Hummm…I won’t try to get into all the different ways and trick, just how I did it, then with enough imagination anybody can adjust a technique for the best of his situation. My high tech marking tool was a small (about 8 sq in) piece of thin stainless steel shaped as a mouse. I didn’t shape it like that, I just pick up a piece of scrap that suited my need and it turned out to look enough like a mouse for us to call it “the mouse”. The important part of all this is that the mouse was a very irregular shape. My second tool, a color marker, I kept changing color for every template so I could re-use my plywood strips without mistaking markings.
I would go along the template with the mouse, tracing the mouses outline on the plywood strip with the nose of the mouse always against the edge of the plate to be. I would later know that when I position the mouse within it’s outline the nose would be marking a point on the edge of the plate. I would use common sens to decide how many points I needed for each edge.
Final step, trace the plate. This is where we realized how some kindergarten lessons were not a loss of time. With the template clamped to the plate, as we don’t want it to move half way threw tracing, I started putting points down on the plate where the nose of the mouse ends when the mouse is placed in it’s traced outlines. Remember kiddy school, putting shapes in there outline? What about match the dots? That’s an other early age lesson. Once all the dots are made, that’s what we did, match them. If the line looked a little broken, I’d use a batten to average it into a smooth curve. Tadada!! There’s the plates outline, ready to cut. I had amazing results with this technique, surprising accurate plates, maybe to accurate. I ended up having to groove a spacing between most plates for good welds.

For anybody who would wonder, it is a duck. Coco was there every day to help with the tracing, I highly recommend duck supervision for such task….it makes an otherwise repetitive and slow process a little more amusing.
Clamping
There are many different ways to build a metal boat but all require a lot of clamping. I include in clamping any method to hold a piece in place. This requires a lot of imagination because nothing is square, no situation is exactly the same, as the boat comes together there are less edges to grab on, we’re not always being helped by gravity and the ground is not always close enough to help, often pieces may need to be stable but still mobile….I have designed and modeled this boat but I would rather associate moments I have really felt smart with some nifty ideas
to lift, hold, or pull some of those heavy plates in place. For anybody who likes puzzle, this is what can bring the hull building to be fun.
My tools: clamps, hydraulic jacks, X jacks, chains, plate clamps, fire logs, rope,my husband,block and tackle, scrap steel, chain block, framing lumber, steel beams, gantry…. and a few fabricated tools.
Before saying anymore, I’d like to make an important point about clamps. Don’t be cheap, there are many things we can cheap on, not clamps. It takes a lot of them, it takes a lot of different ones but mostly it takes some good quality clamps. We had bought a lot of clamps that we believed were good ones and we did make good use of them. But…There are times they were just not strong enough, a better swivel would of done better or they didn’t quite hold those non parallel surface well enough.
Mark showed up some day with an 18 inch Bessey Clamp, one of the best ones with the fancy swivel nose. It became my favorite tool, to the point I gave it a little name. At a hundred dollars a piece we were shy of buying more but did end up getting an other one, and one more, and a couple more….I absolutely love them, but will not get into explaining what makes them better. You want to build a boat? Go buy one, you’ll get more
Saying that, only heavy besseys would not be good neither. I still like having lighter clamps around of different shapes and types. Diversity is the key, good quality is a necessity.
The best way to share some of our clamping tricks is probably to explain or comment some pictures. Isn’t an image worth a thousand words.
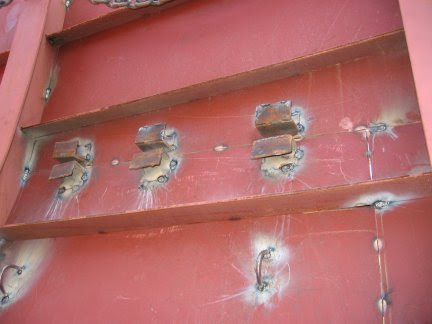
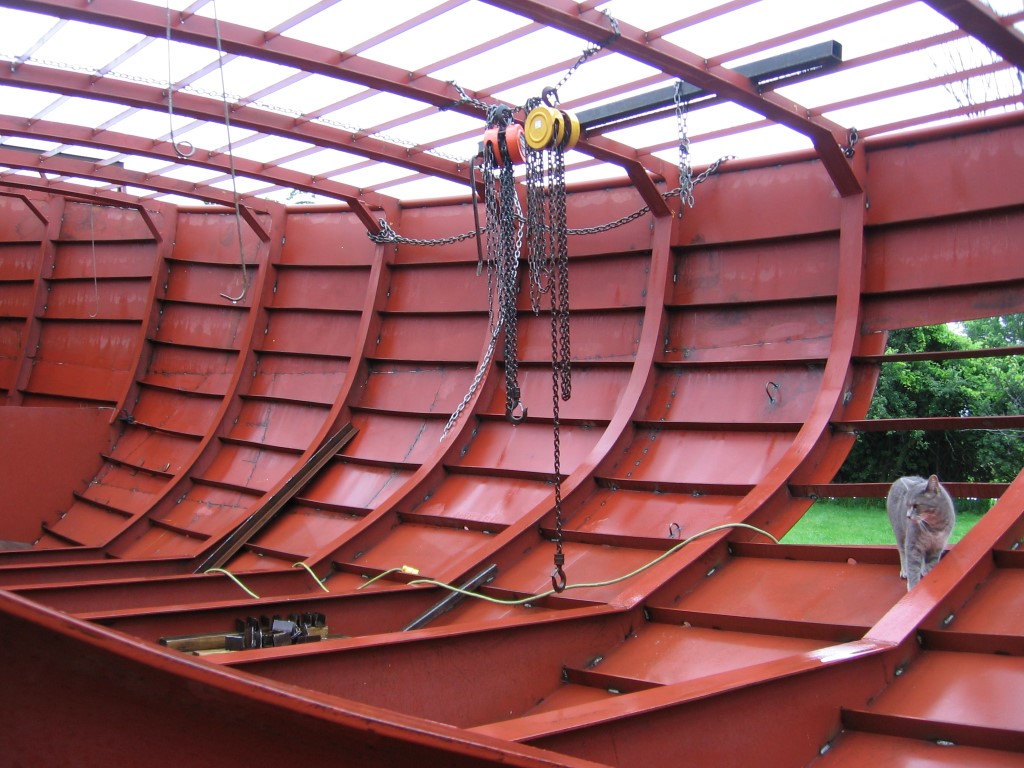
I welded all sorts of loops and brackets directly to the plate. It does make more work to cut them off and grind everything clean when done using them but saves much more time by making the job simple. I lifted all the plates into place by hoops. The hoops were localized so I could also use them to pull and position the plates against the frame. With a couple chain blocks I became the queen of plate balancing.
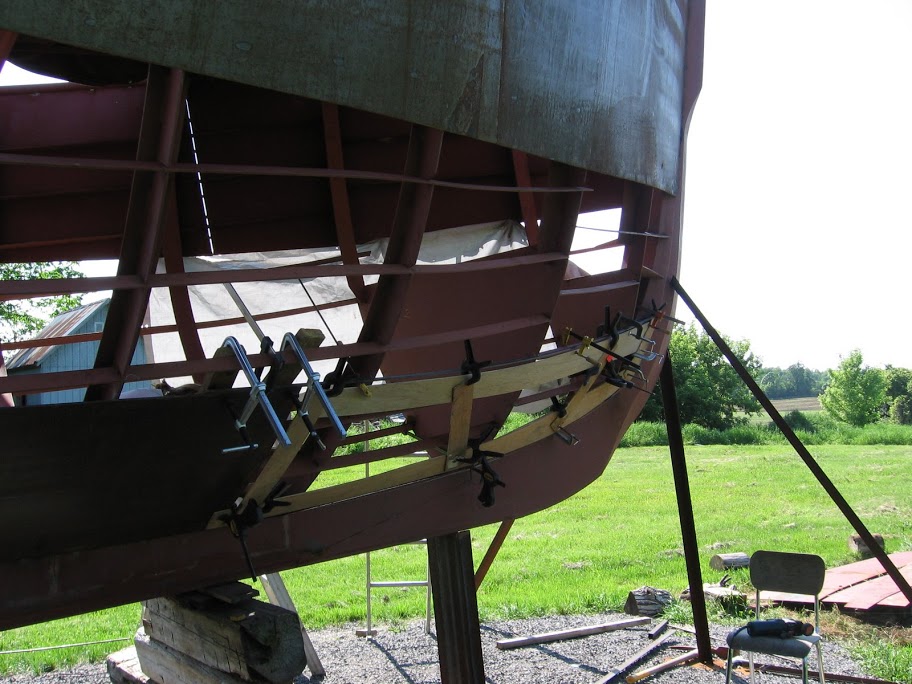
Some edges like the top of the radius plate to the top plate were not strait forward to pull in as there was no edge to clamp around. Brackets solved the problem. I would used a short piece of lumber positioned across two longitudinal or to ribs and clamped up to it.
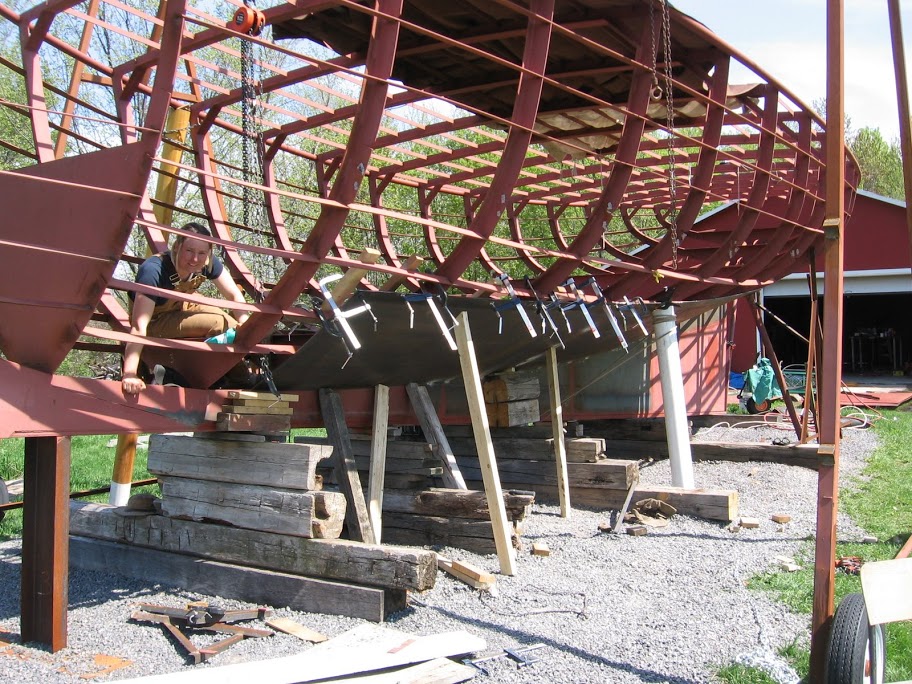
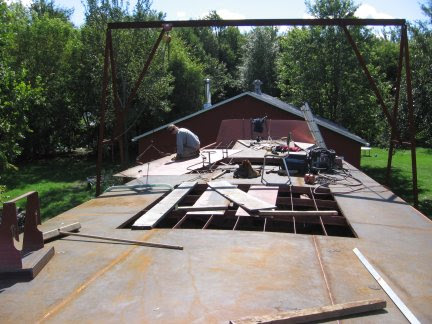
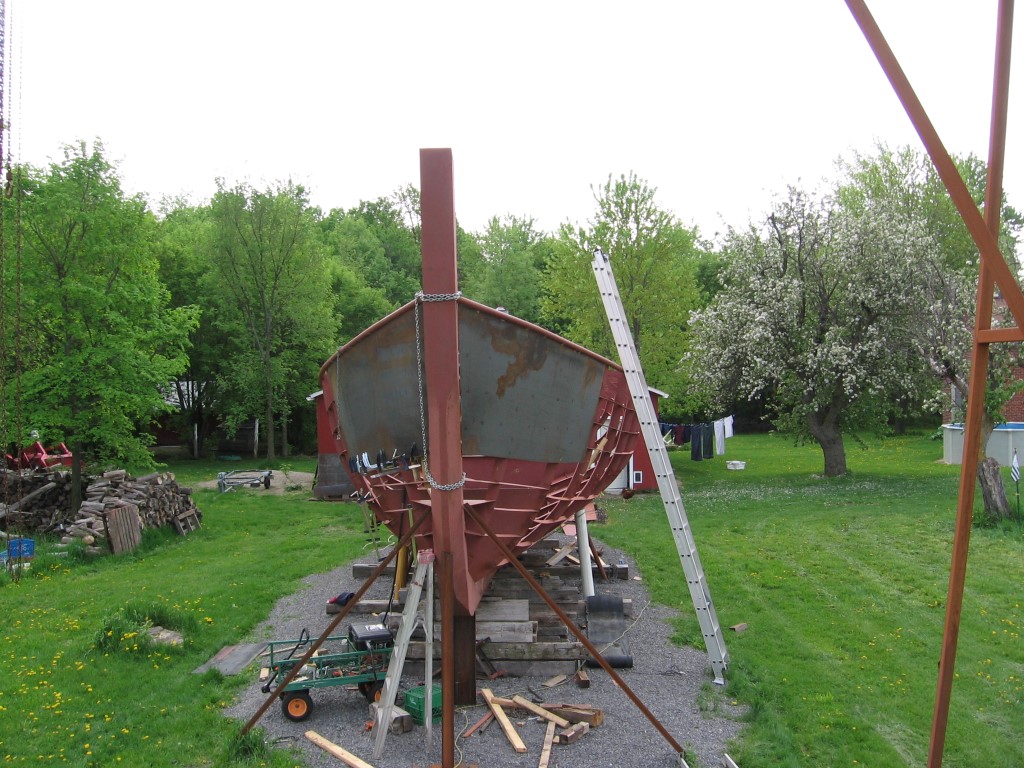
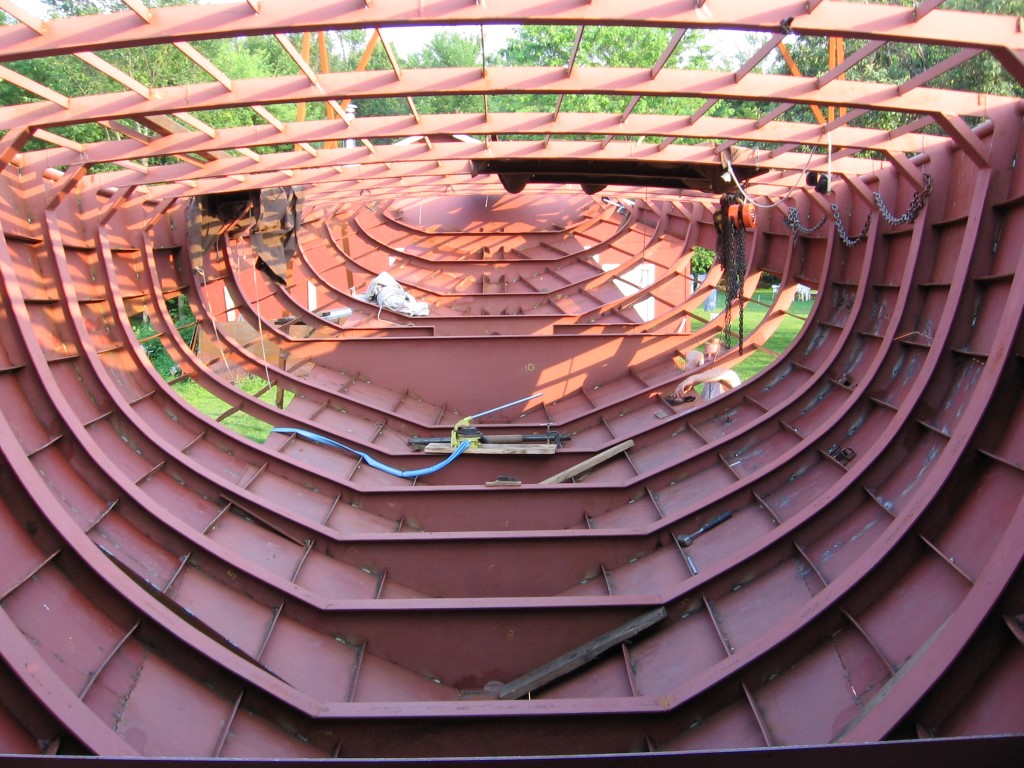
Things to notice on the last picture: All the different clamps we used. The short pieces of lumber across longitudinals to clamps against. The standing lumber wedged between the ground and plate, and along the keel. The small stacks of lumber over the beams across the boat, the’re holding the plates corner.
Pushing from the ground up against the frame was really handy and gave more control on the plates shape than on would think. We also made up a “jack post” that we used when the wedge lumber wouldn’t quite do it. The jack post was simply a pipe with a hydraulic jack that we welded on the top of it.
When we started plating the upper parts and mostly for the round plates we had to get creative. We started using the cars xjacks (we desrtoyed 2), the hydraulic jacks dont work out of position.
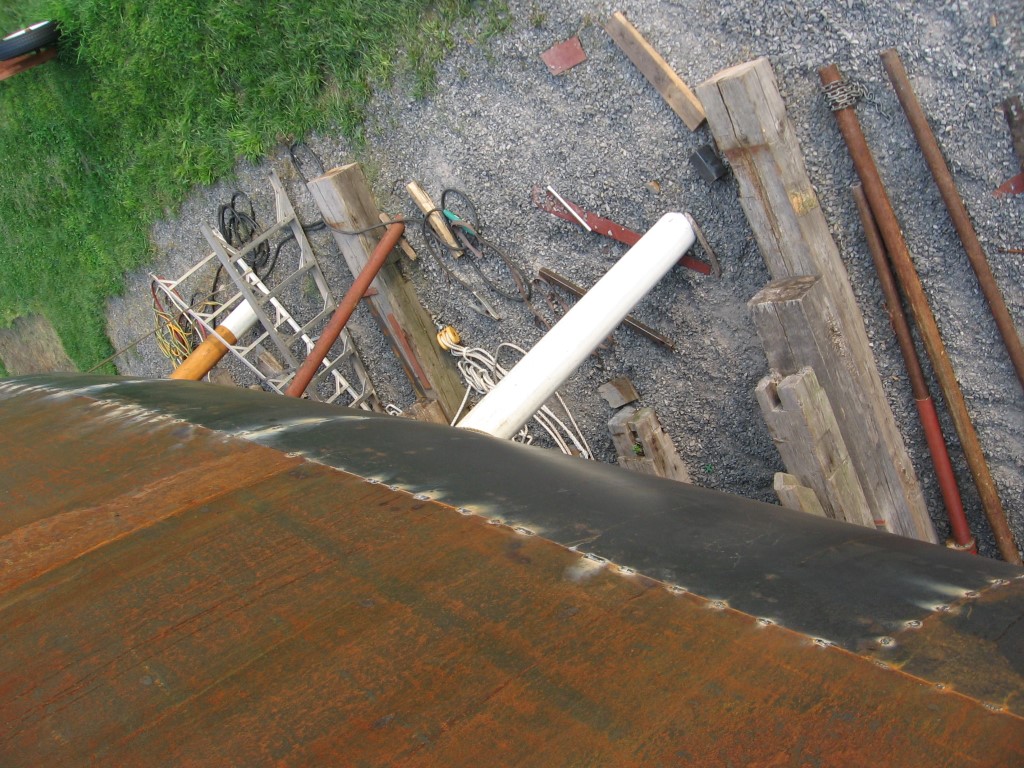
On the next pictures we didn’t have any edge to clamp the front of the plate. By pushing against a well secured chain with a jack we could tack a spot and move on a little further.
On the same picture, the horizontal pieces of lumber are holding the plate up close to it’s final position while we do the final positioning and clamp it.
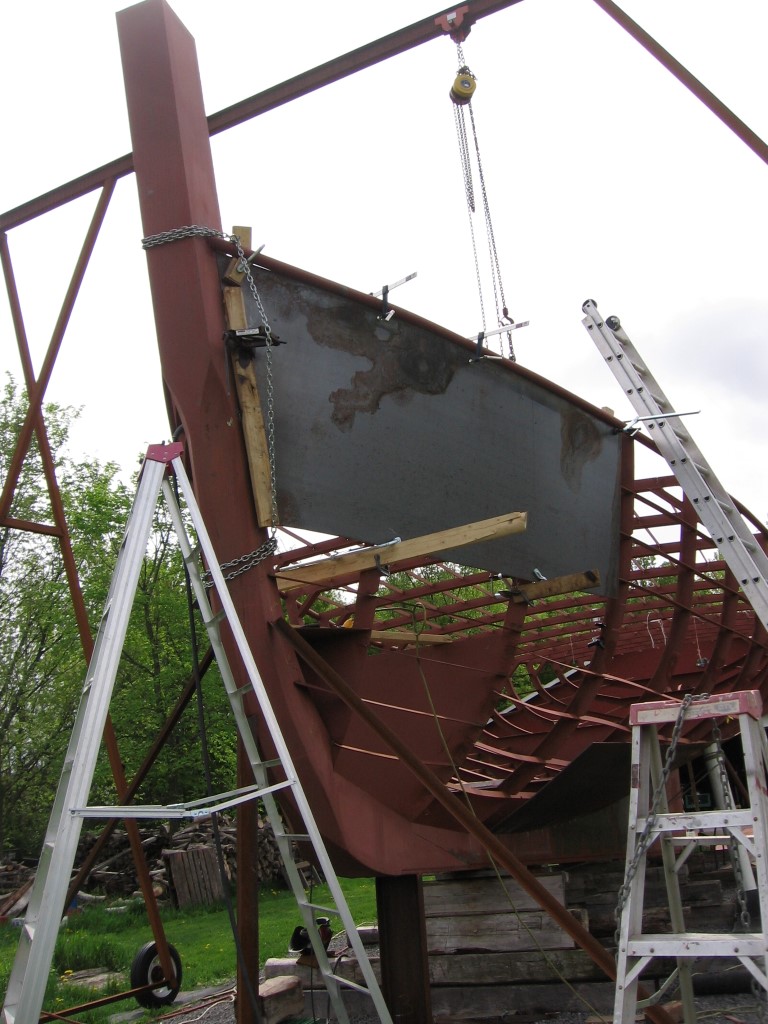
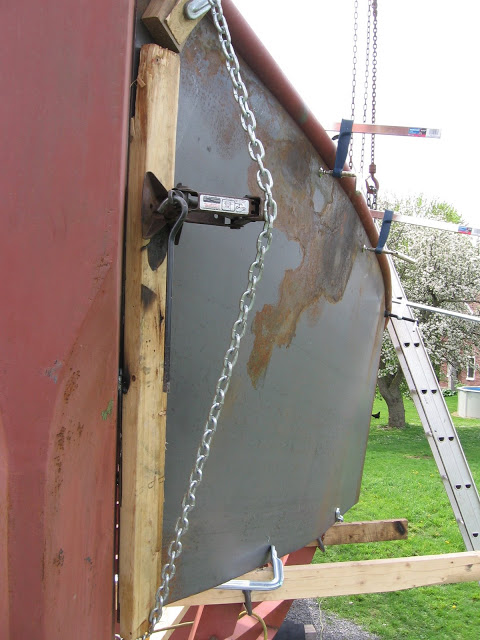
We used the chain and xjack a lot and came up with all sorts of ways to secure the chain. If we would of had to, we wouldn’t of hesitated wrapping the chain all around the boat but always found better ways. I don’t have any pictures of the work on the upper and round plates as when we would start clamping we would work until the plate was tacked in.
The last pushing methode I can think of is tricky to described. We used a long and strong pipe at the end of which we welded a stopping hook. At the top of the boat we would secure a chain along the deck pipe. By slipping the hooked end of the pipe under the chain we obtained a lever arm. Where we wanted to push we would position a block on which Mark would push with the lever arm until I weld a tack on. We read about this trick in Tomas Colvin’s book Steel boat building.
The deck plating is fairly strait forward. Working on a somewhat flat surface with the help of gravity is refreshing. I scribed the edges on the plates strait off the boat and offset the curves appropriatly to cut the plate just on the inside of the middle of the deck pipe. The longest step of deck plating was clearly the welding and grinding.
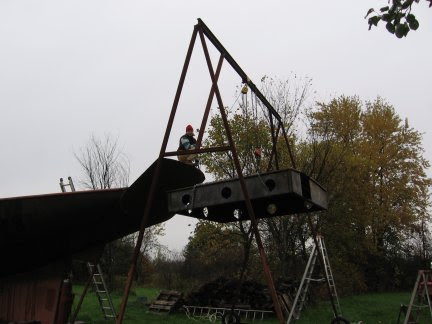
And up goes the cabin top.
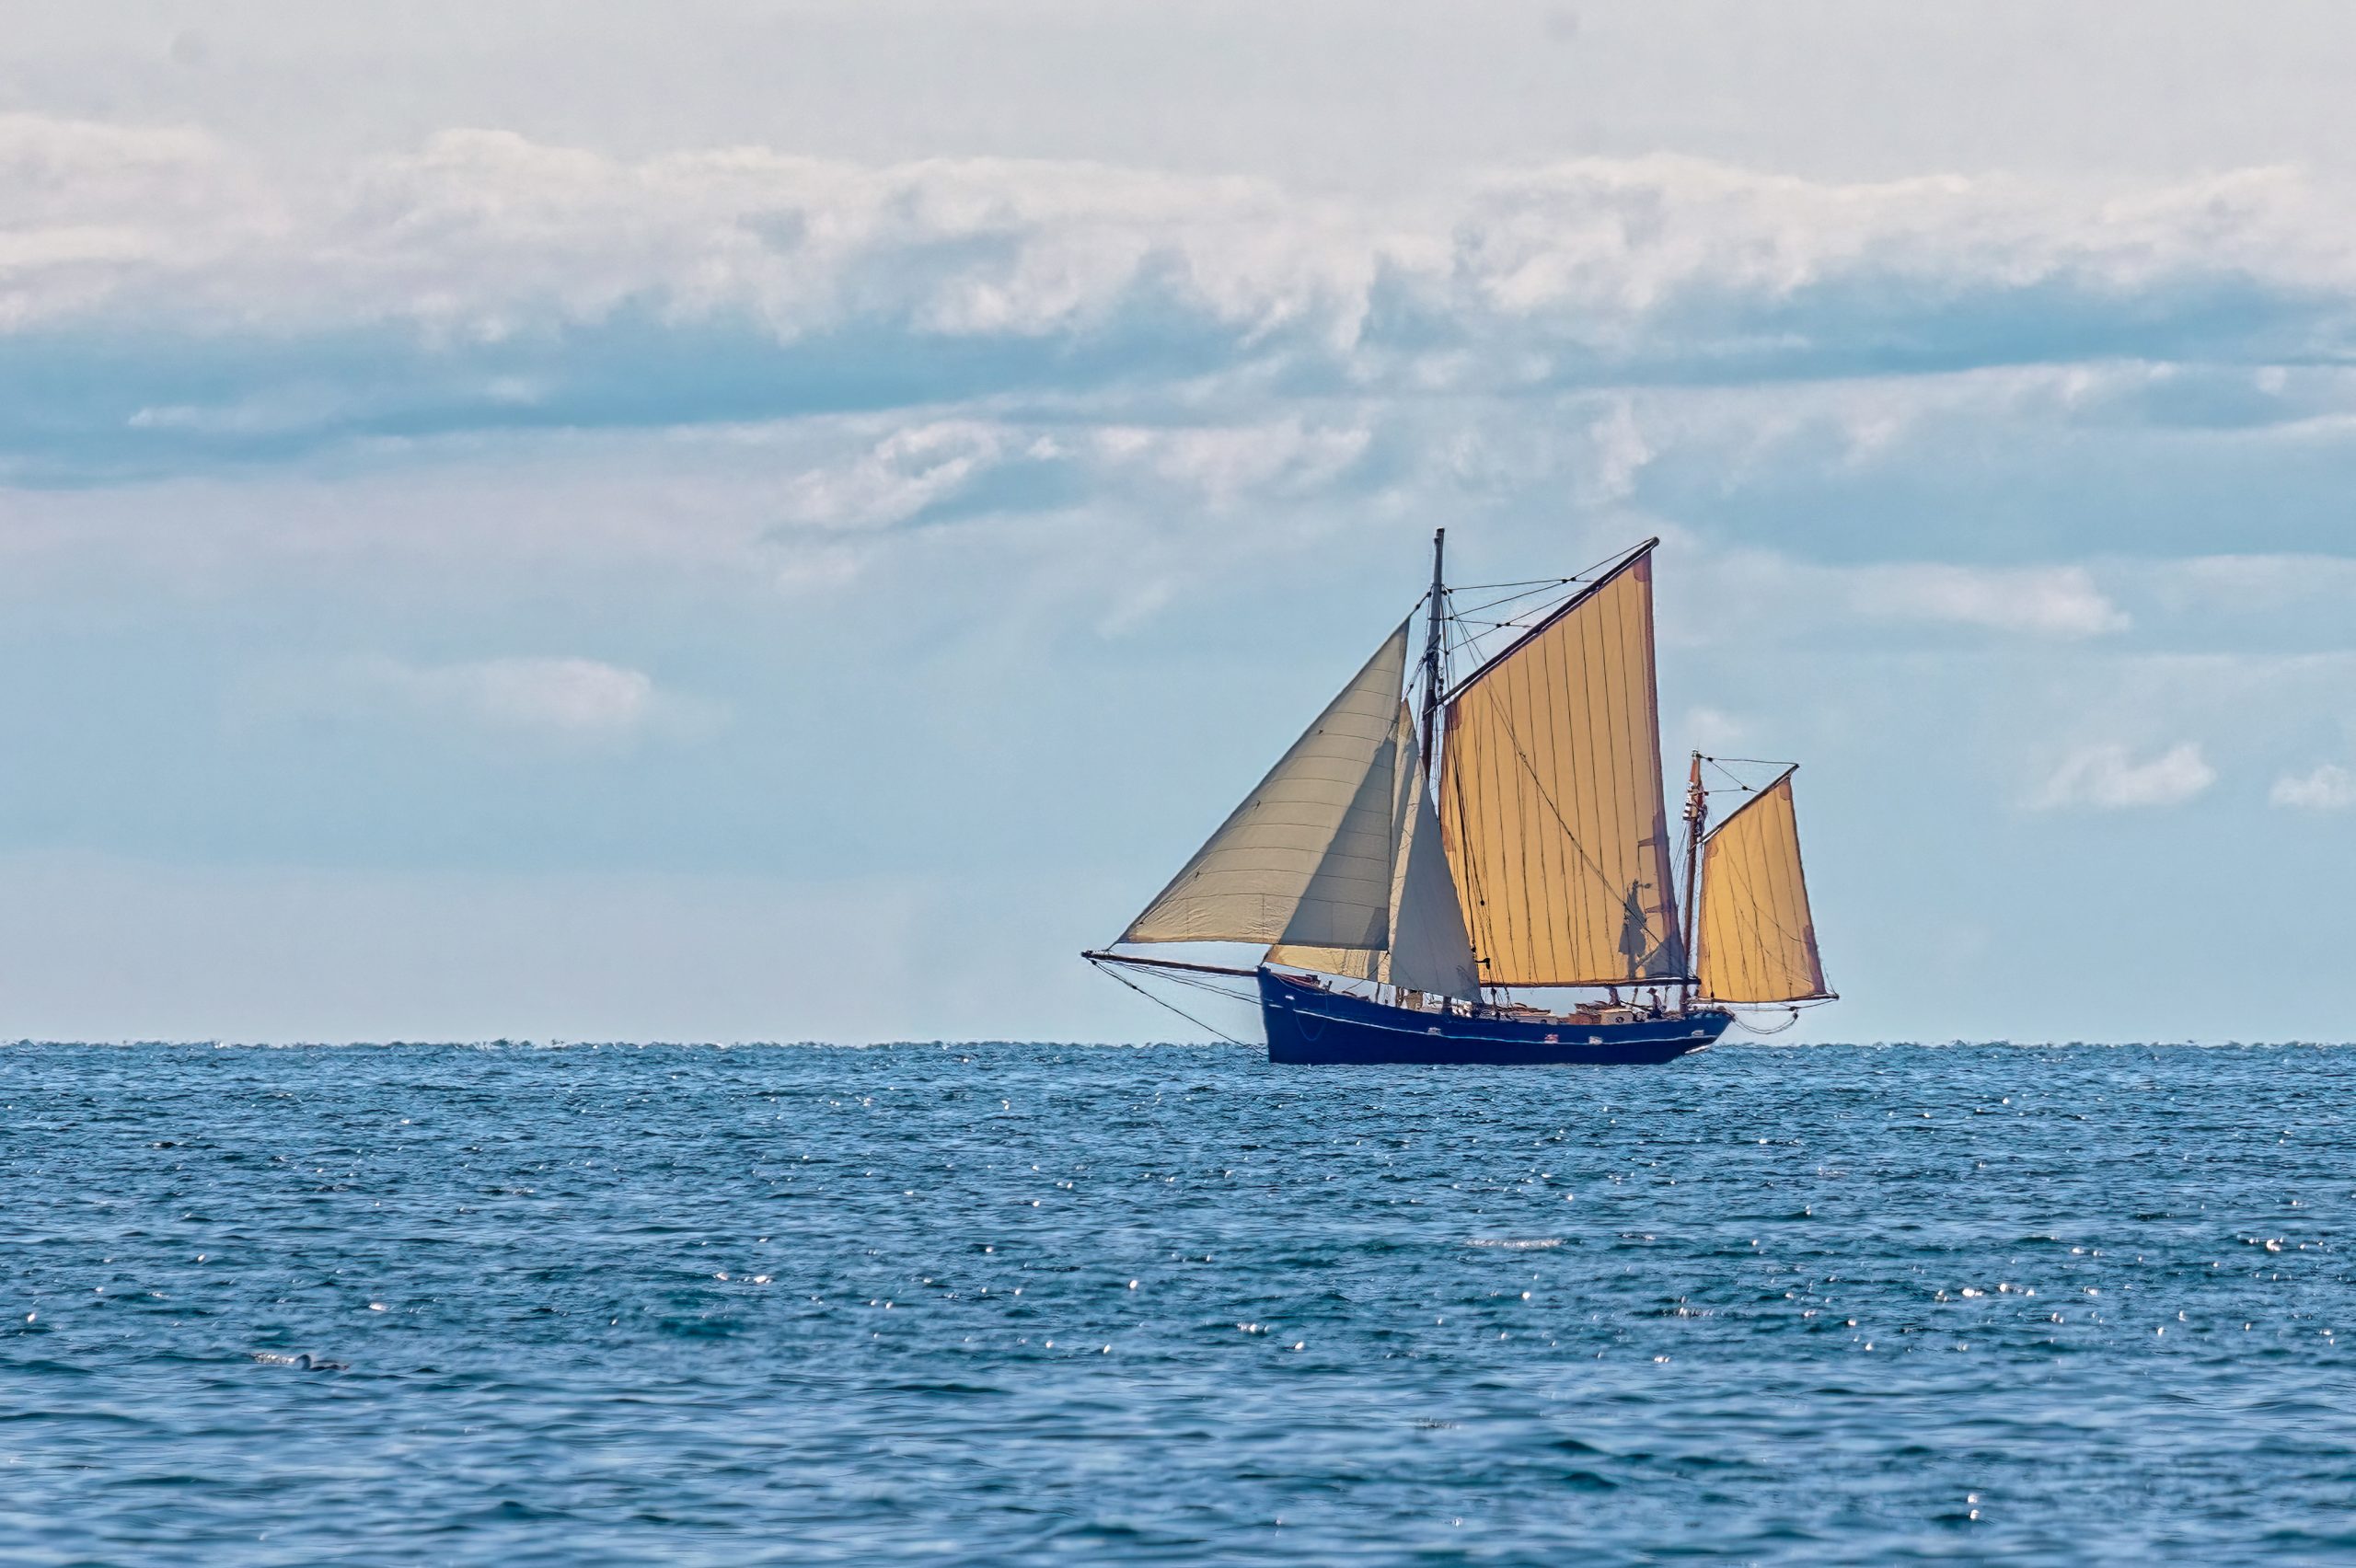
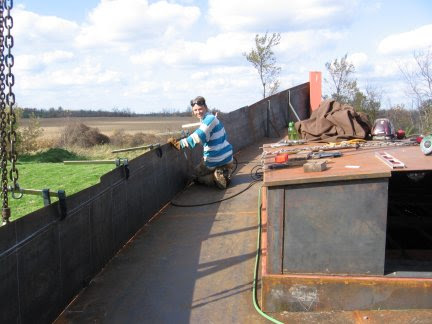
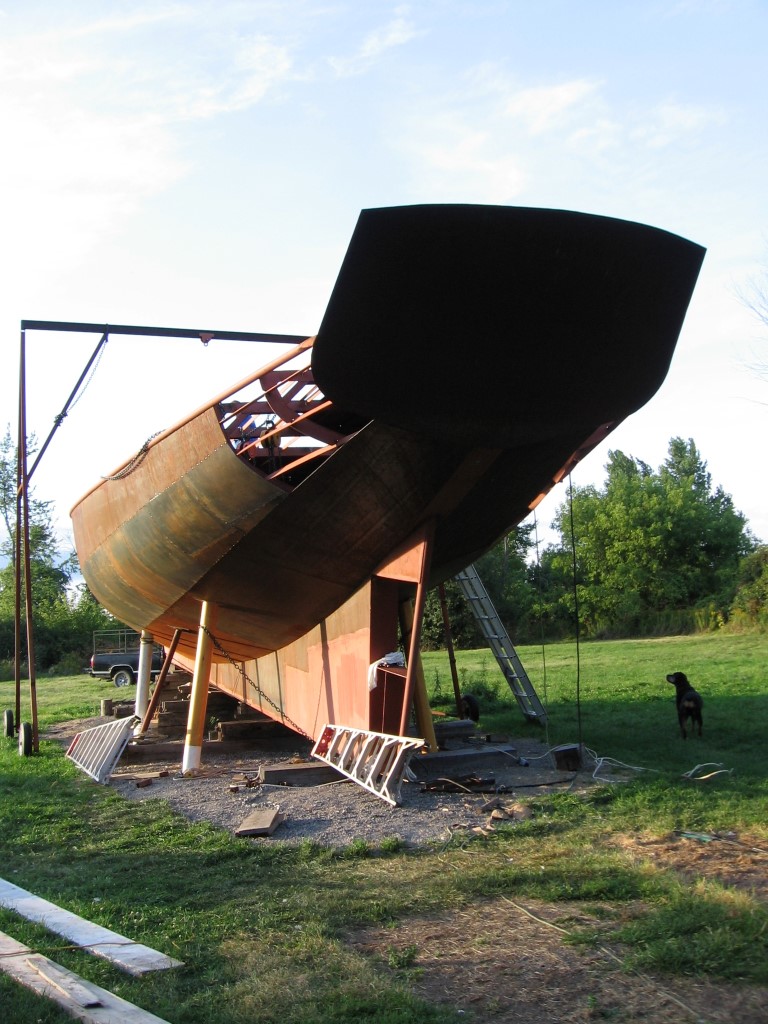
Putting up the bulwarks. That was very fast visual progress. After having seen the boats shape without its upper shear line, we had to get used to it. It made the boat look huge…
We traced and cut the shear line on the bulwarks after they were all tacked in place.
All the plates are on!!
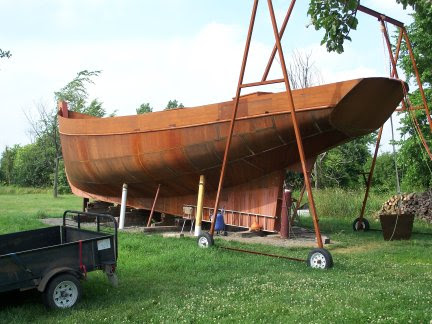


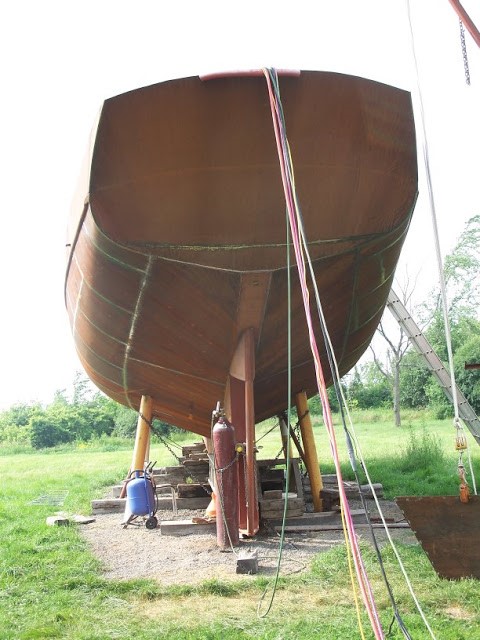
Steel can curl quite tight with enough persuasion. I plated my hull cold forming the 3/16 plate. The plates were pulled up against the hull using two chain lifts and getting it to curl was not that hard. My tightest radius on the hip is of about 18 in and that plate was one of the easiest one to get on the boat (obviously, on that one, I reached the elastic limit of the steel).
I decided to plate this manner as the radius is not constant, I think a constant radius would be a little more challenging to obtain.
The trick is not as much to get the plate to curl as to get it to curl right. It needs the longitudinals positioned properly to guide the plate through the radius that is expected. Obviously the plat also has to cross a rib so it doesn’t kink over the longitudinals. The ends tend to be flatter but this is not a problem as long as it’s what is expected.
I drew the boat so the top and bottom of the “radius chine” plate faded into the “not as curved” top and bottom plate. The truly radius plate starts a few inches away from the edges and only after crossing a longitudinal. I didn’t have chine bars but as an afterthoughts even though it would have been more welding it would of made easier to hold the seams in, which is a bigger challenge then the rolling of the plate.

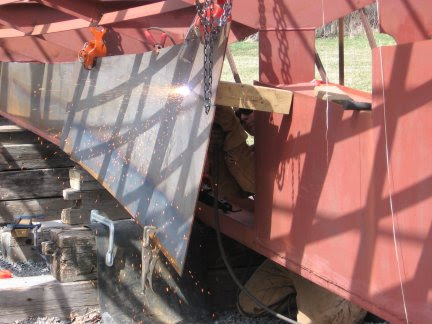
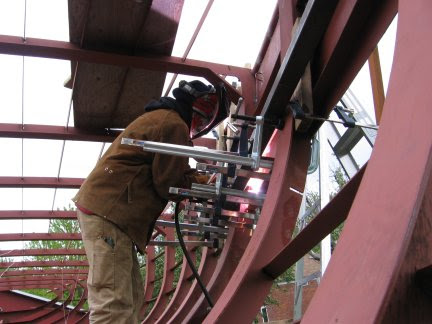
Grinding the seams
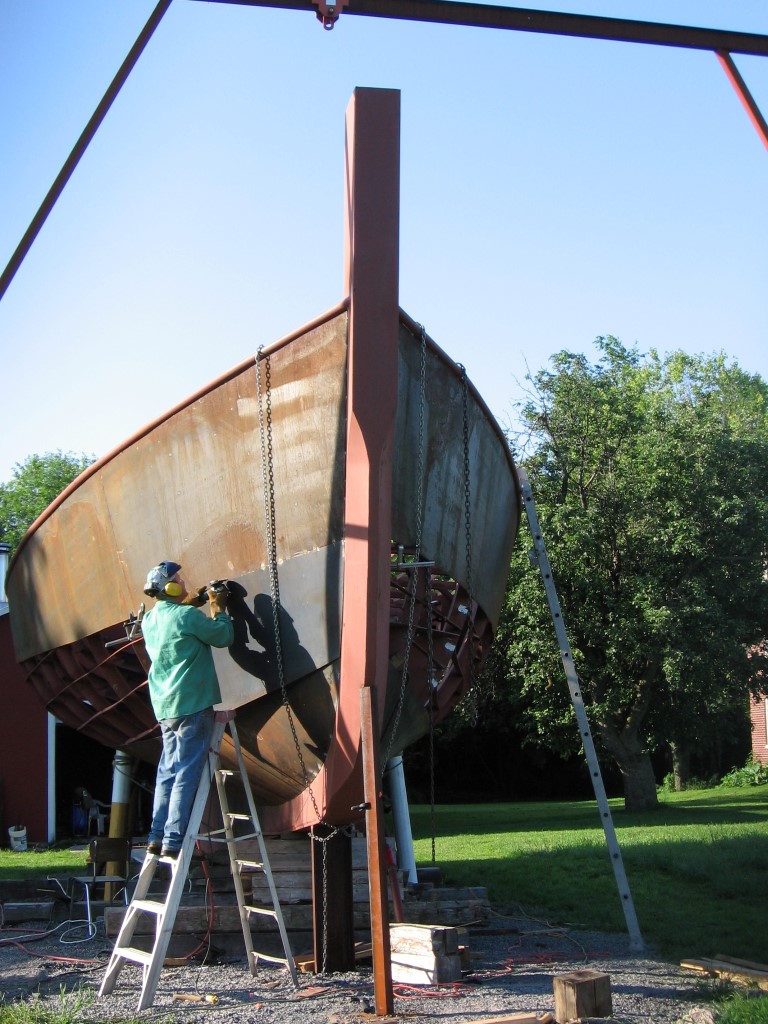
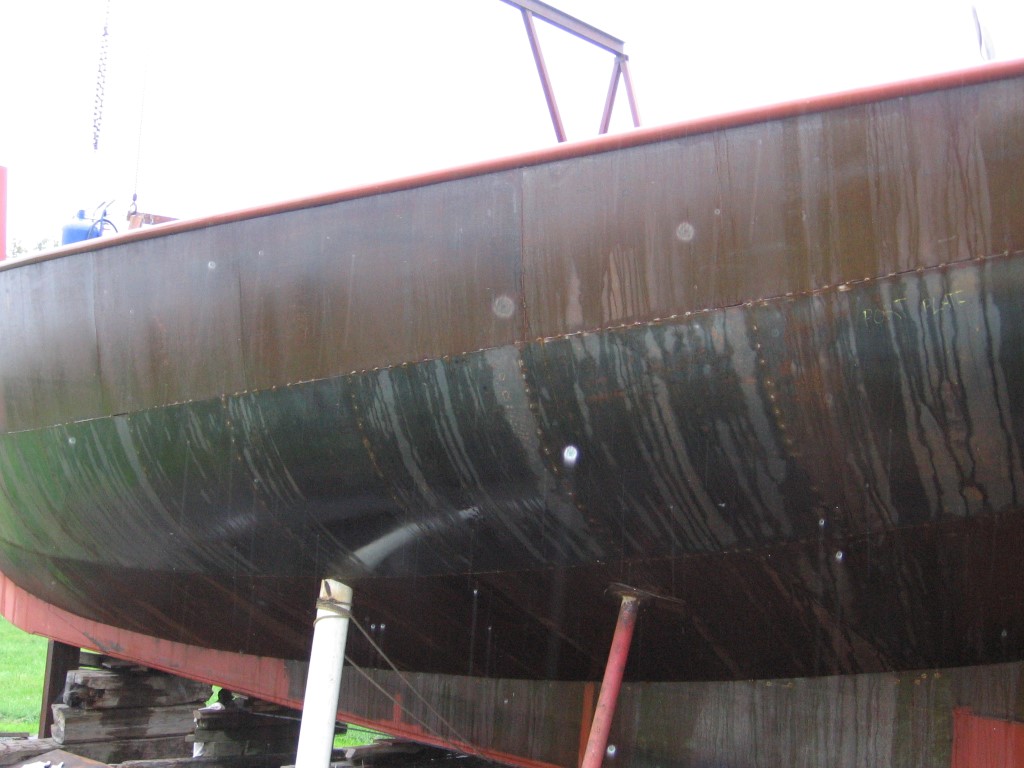
All the outside, flat surfaces welds are ground smoothed. While it is prettier, the main reason is to maximize paint adherence. Paint doesn’t like rough edges and is at risk of erosion on uneven surfaces.

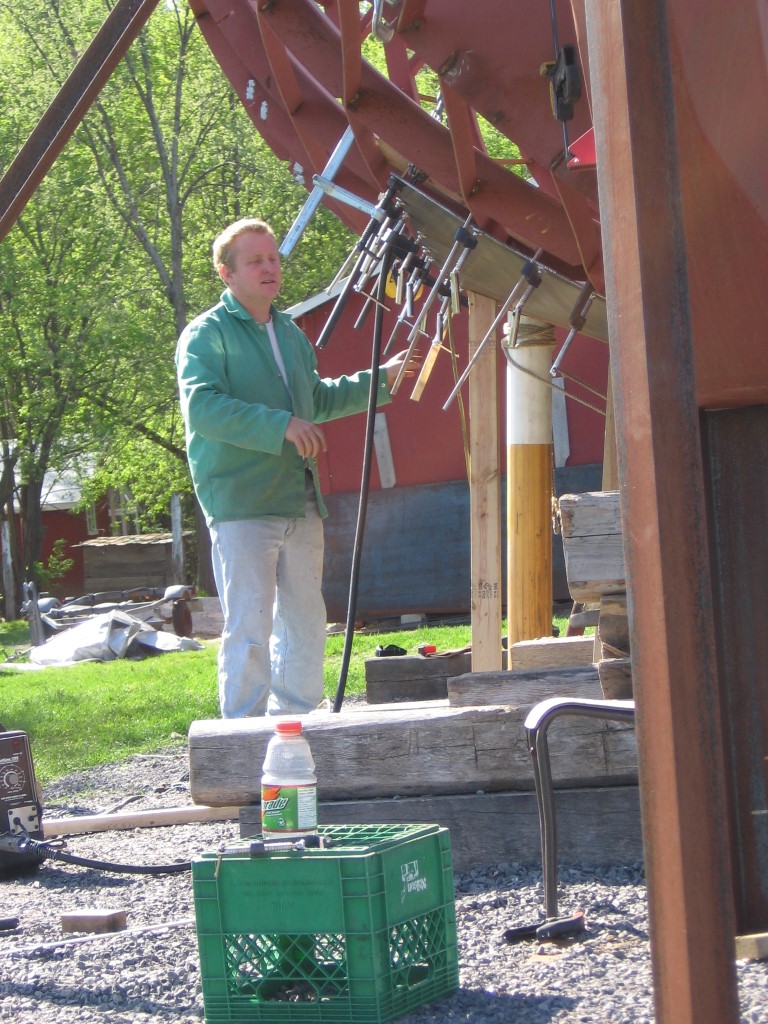
Mark was busy grinding the welds. Grind, grind, grind…non ending grinding
Smooth shiny seams