How to have a blast with sand!!!
There is very little pertinent sandblasting information available and even less information applied to steel boat building. The metal protection system (sandblasting and painting) is a huge proportion of the cost of building a steel boat and it can be quite intimidating to face blindly. I am hoping the information I’ll provide can help others avoid bad experiences and surprises during this not quite pleasant step of boat building.
I wouldn’t consider myself a expert but have done a lot of sandblasting with a few different rigs and have a good understanding of it. I do have a neighbour, Terry, who I consider a sandblasting expert. He has been running his heavy equipment restoration shop for the past 25 years and has had the patience to answer many of our questions over the past five. Up to now I have sandblasted with a few different rental equipment during the construction of our previous boat and Terry’s gear on the current project. As we just purchased our own compressor and pressure pot I am hoping we will be able to finish the work with our own equipment.

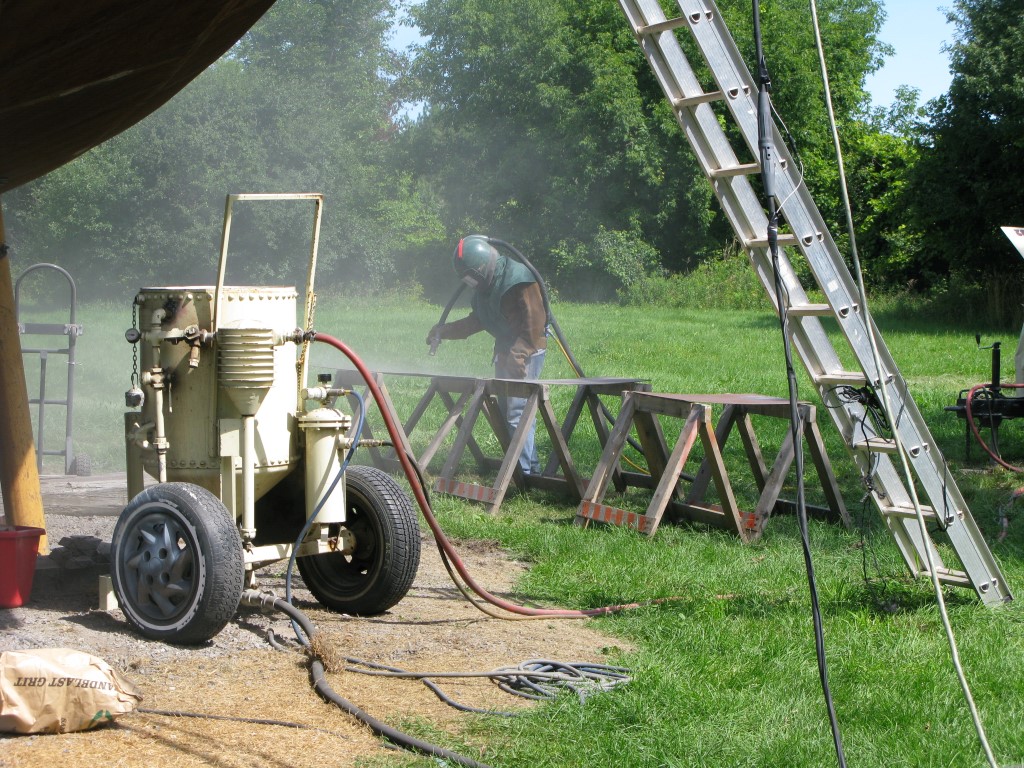
Pressure pot under the boat, on the left. Compressor in the back and Mark sandblasting.
About sandblasting equipment:
First the compressor. The rule is more CFM (cubic foot per minute, air volume) the better. It’s as simple as more CFM means less sand for more surface in less time. I would consider that to sandblast a boat 175 CFM compressor would be the lower end to be used, if one doesn’t want to ruin himself buying sand. The compressor we purchased is a 175 CFM unit and that will be fine but I’m not sure I would hire a contractor with this small of a compressor. For a similar or a little higher hourly rate I know that the contractor with the 250 CFM machine will cost me less in time and mostly in sand. Pressure requirements are not very high, sandblasting is done at 100psi.
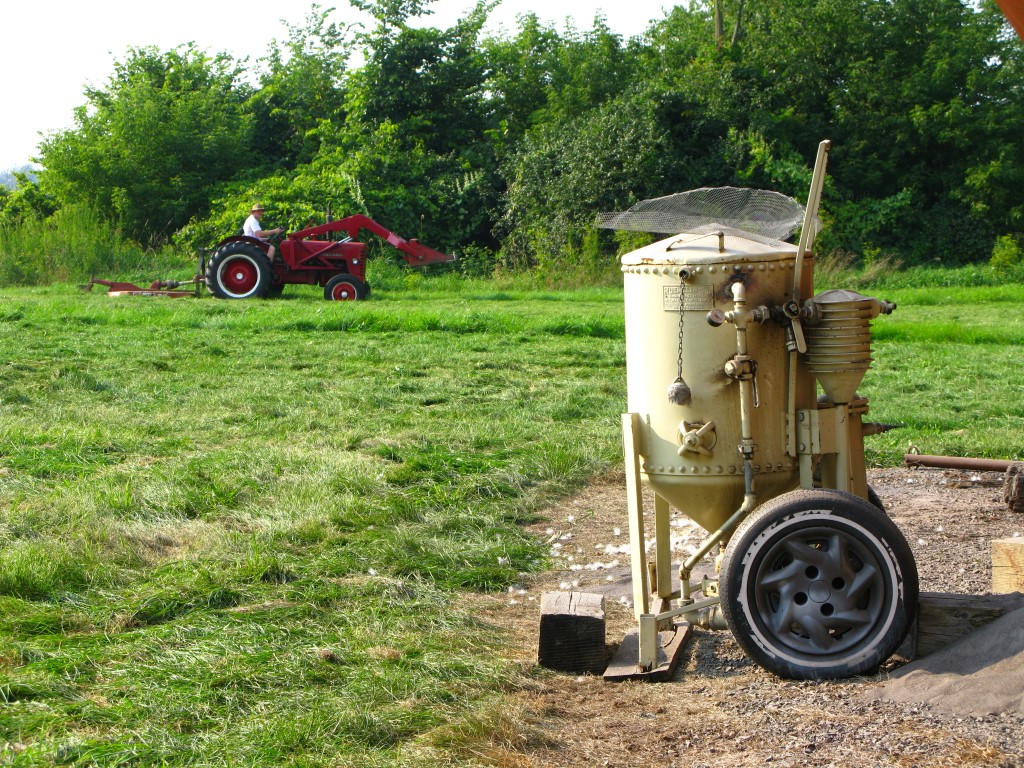
This pressure pot is huge, smaller would of been fine. The little cylinder on the right is the water separator.
Next, the pressure pot. The obvious variable about the pots is their sizes. If you ask me what size would be ideal for blasting a boat, I’d say 250-300lbs abrasive capacity would be just fine. This would be the amount of sand you could expect to be going through within an hour or a bit less. After an hour of continuous blasting, arms, shoulders and back don’t mind a five minute break to stretch and relax while someone else fills the pot. Mark and I also tend to switch turns at every pot refill. What we do is that while the fresh worker suits up, the one who just had his turn at the hose now fills up the pot before taking his break.
The pot should also be equipped with an air dryer which I don’t know much about. Ours is an expansion chamber with heat sinks. When the air travels through the air drier it cools off which causes the water to condense. A small valve at the bottom of the units stay cracked open to exhaust the water out of the system.
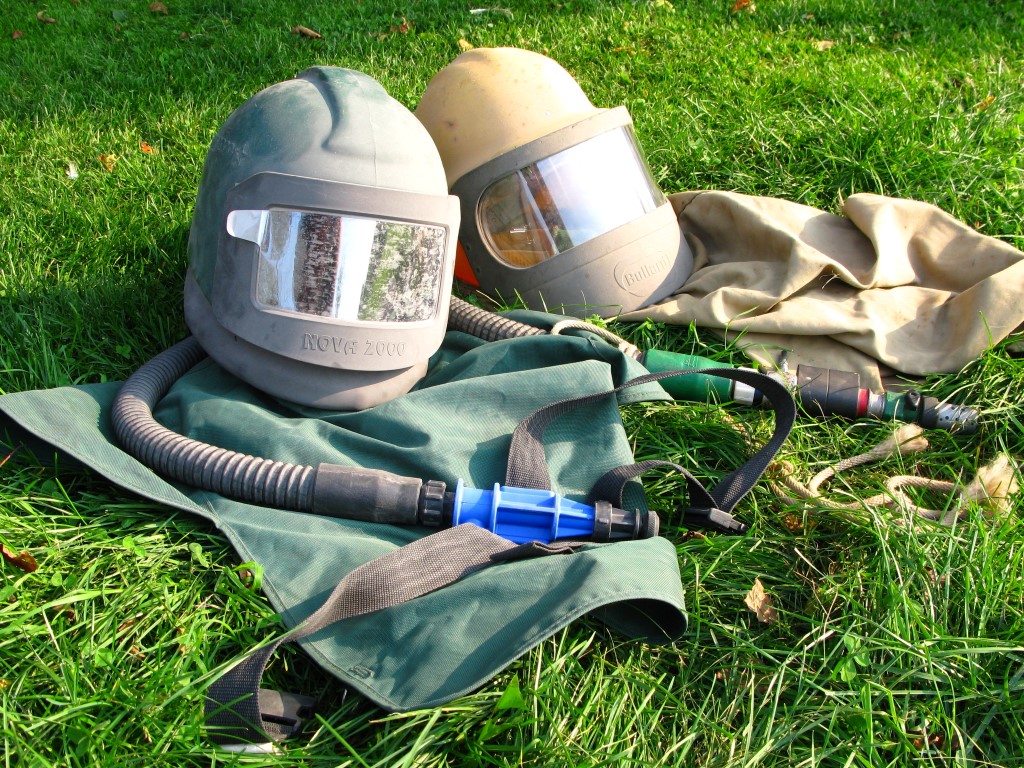
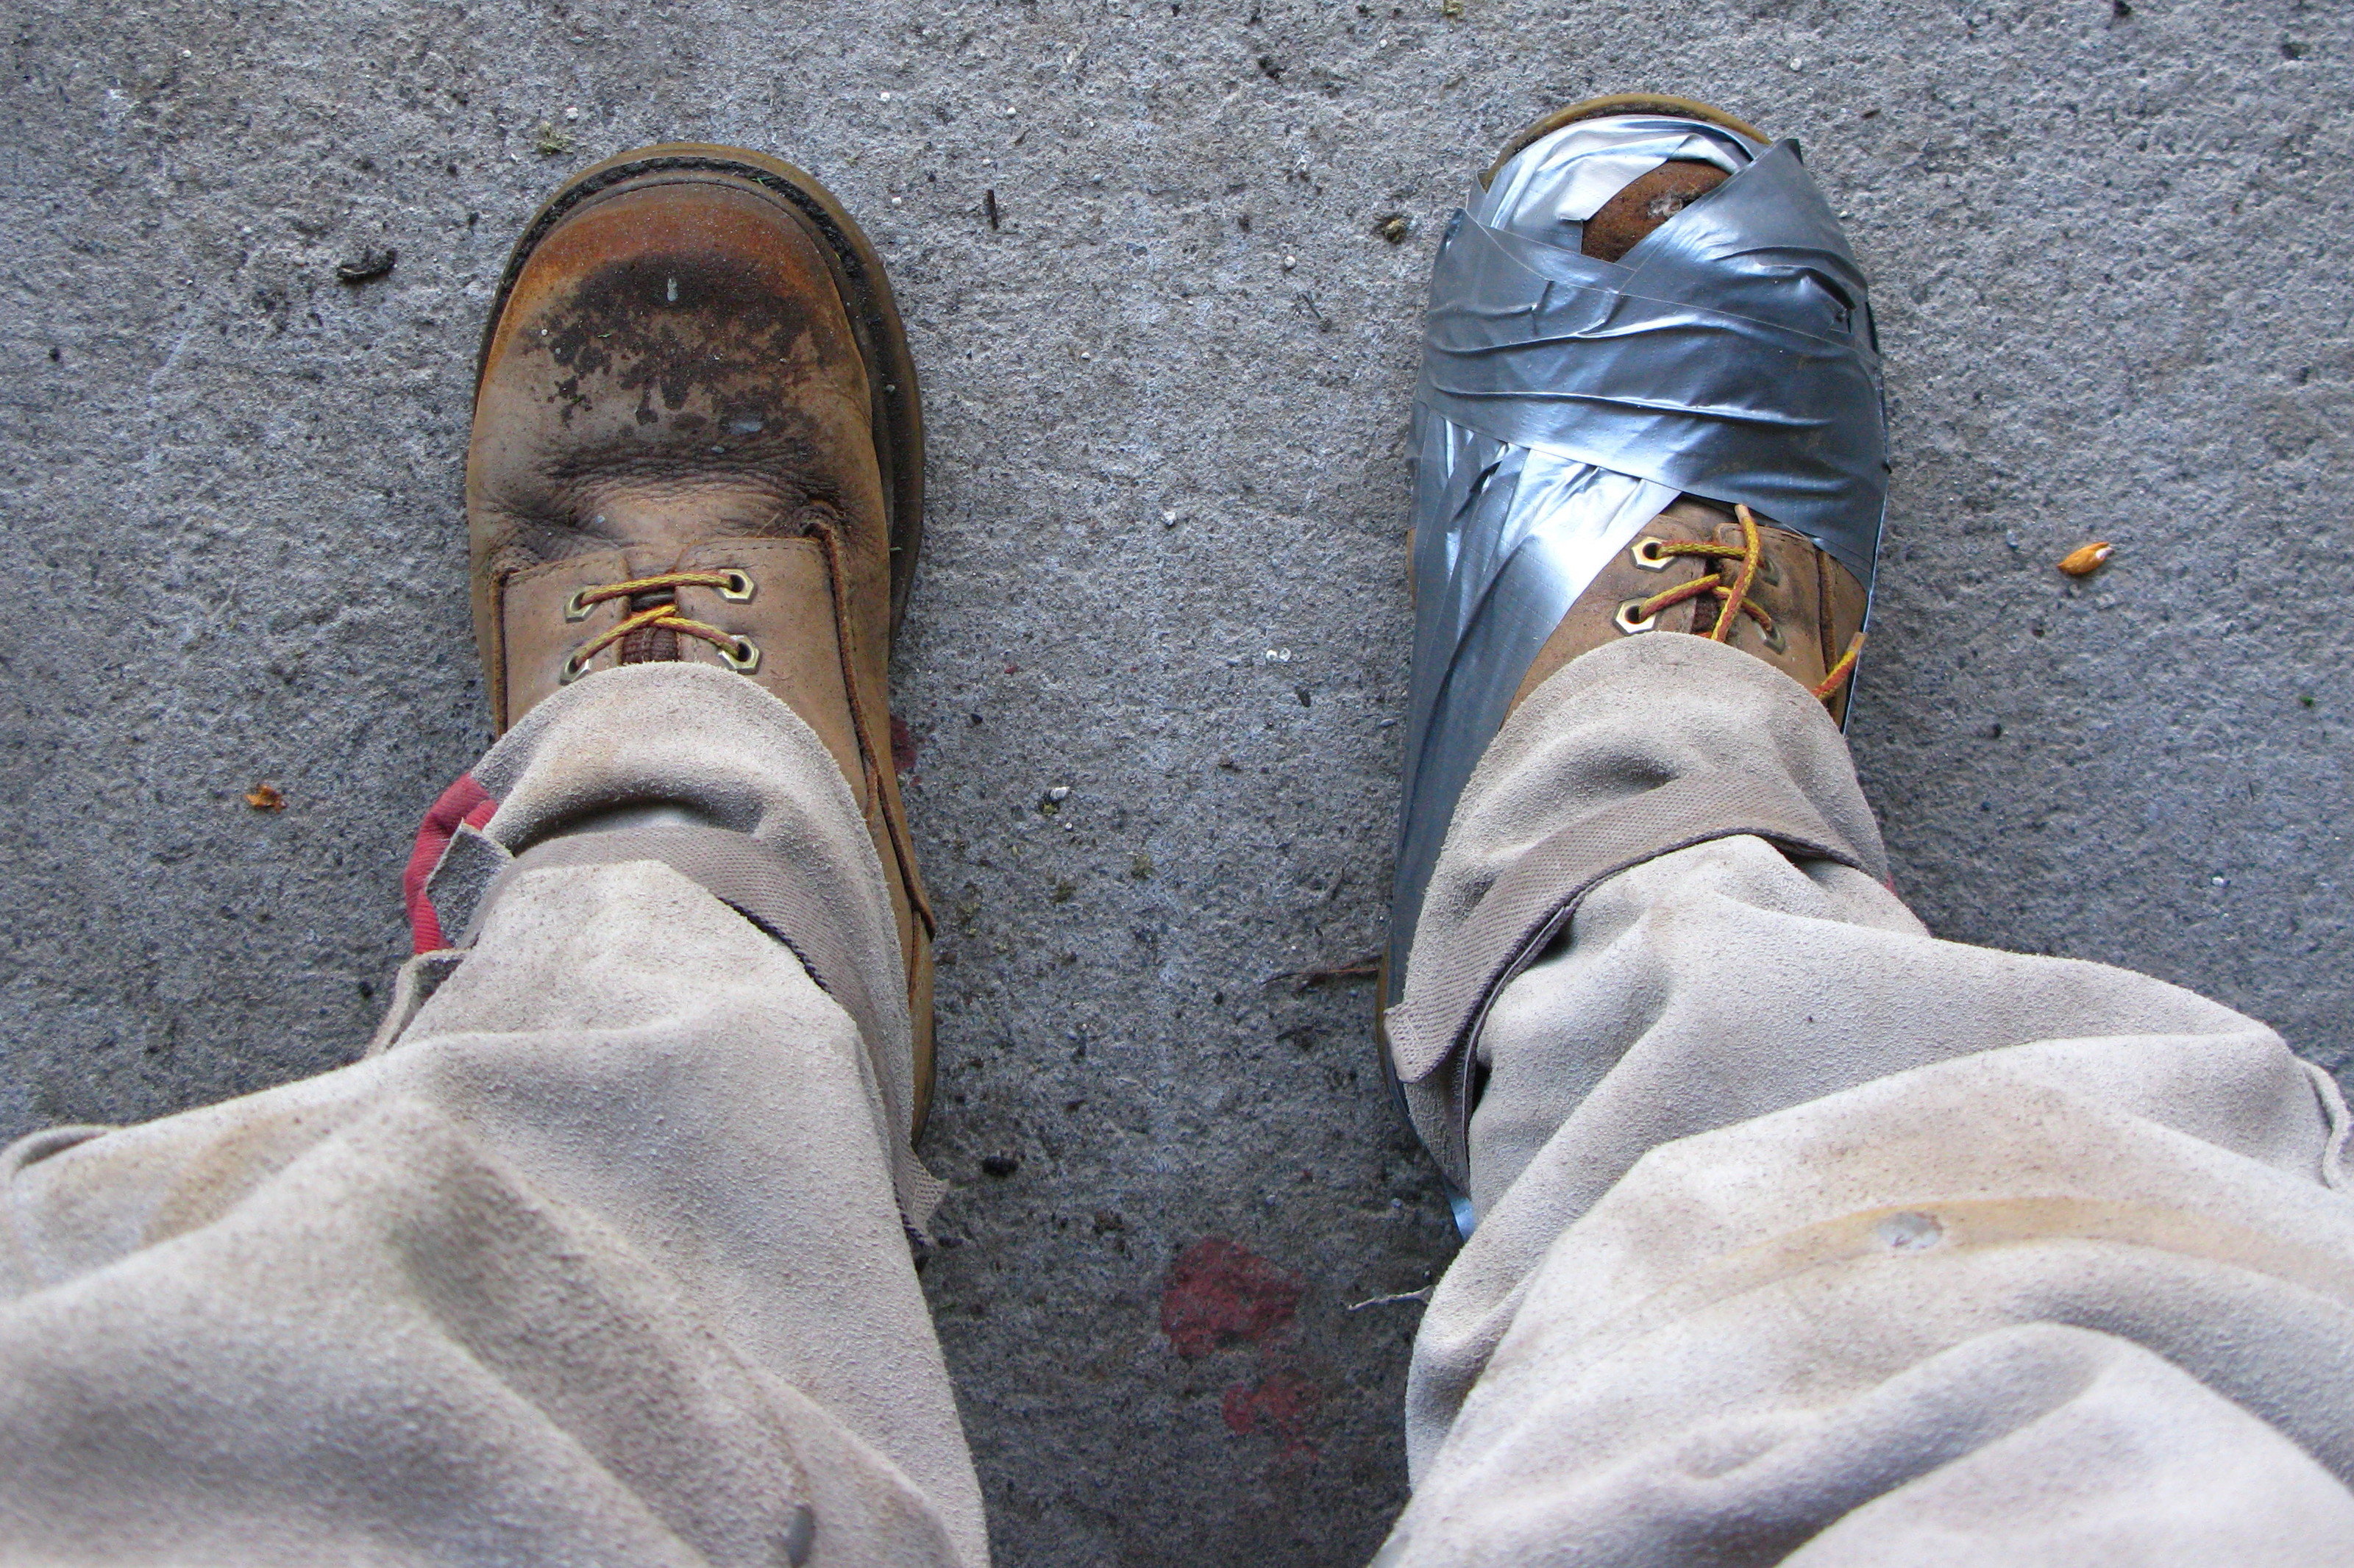
Last, safety equipment. Every little bit of the body must be covered with tough clothing. I generally wear thick denim pants, a light leather welding jacket, thick welding gloves and work boots. Expect your boots to look miserable (but amazingly clean) when you’re done. I have seen people tape the bottom of there pants to the boots. That’s not a bad idea if you’re going to be blasting down, it has happened to me to bring the hose a little close to my feet, the air lifted my pants just enough to get a blast on my leg….ouch. The face must be covered with a hood and airways protected from the dust saturated air. I have sandblasted a full boat (inside and out) with a simple hood and 3m air filtered respirator, that was a hell job done with a hell set up….never again! The proper set-up is an air fed abrasive blasting helmet. There are two helmets I know of on the North American market, the Bullard ( http://www.bullard.com/V3/products/respiratory/Supplied_Air/88VX/ ) and Nova ( http://www.nortonsandblasting.com/nsbnovahood.html ). I happen to have used and own both. The Bullard is the one I most commonly see used on industrial work sites. I would guess this is mostly because it has been around the longest and is better fitted for multiple users applications. It fits on the head like a common construction helmet with the same type of harness. I like better the Nova helmet, I find it more comfortable and a bit lighter. The lens is a little smaller than on the Bullard but it has these great “tear away” shields which allows you to stack a few of them in the holder and change (rip away) the top one without taking the helmet off . The Nova fits on the head more like a motorbike helmet. The padding in it also dampens well the noise, but I still use ear plugs. Please wear ear plugs as soon as that compressor gets started, everybody around the site should protect their hearing. Everything is loud, from the motor to the hissing sand. A blowing hose or the opening of a pressure release valve can make an unexpected horribly damaging loud noise. With the air fed helmet comes the breathing air filter. The air from the compressor is contaminated with oil and is deadly, it needs to go through a well maintained breathing air filter. The hose linking that filter and the hood must be breathing air rated hose. A nice add on to the breathing equipment, which I wouldn’t go without now, is an air cooler. This little tube, attached to your belt, cools off the air just before it enters the helmet. Dressed up to sandblast , the main way for the body to cool off is the air we breath. As the compressor heats up , the air gets hotter and eventually gets quite hot; the air cooler keeps the workers micro environment bearable. Something to note about the cooler is that it exhausts a bit of water. The little bit of dripping could be a bit of a problem if working over white blasted steel.
Unfortunately the safety equipment is usually not available in rental and is not cheap. If you are building a metal boat and are going to do your blasting yourself, this is not a crazy investment…it’s your health. I have exposed earlier on my website how I use my air feeding gear when welding, and how this has greatly reduced the impact of welding and grinding contaminants on my health.
Sandblasting results applied to the finish expected on a steel boat:
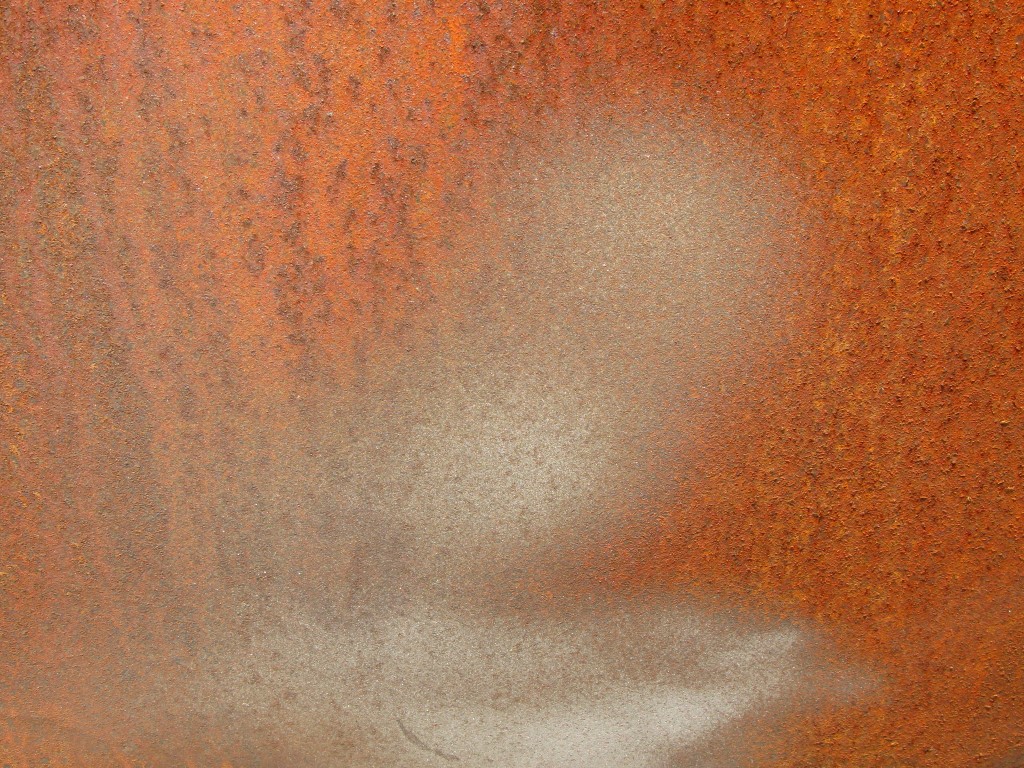
Brush blasted spot on the weathered hull
The sandblasting of a steel boat has two reasons to be. First we want to remove the mil scale to avoid it causing galvanic corrosion by reacting with the steel. We are then aiming for as white of a finish as possible. Sandblasting to white metal (SSPC-SP5 (SSI-Sa3), or NACE #1 surface preparation standard ) means what it means, the result is a white (pale grey) surface. A commercial blast (SSPC-SP6 (SSI-Sa2), or NACE #3) would leave some of the tougher scale on the metal and a brush blast ( Brush Off Blast SSPC-SP7 (SSI-Sa1), or NACE #4) would only blow the loose impurities. If you are hiring a contractor to sandblast your boat, make sure the finish you want is clear and verify that you are getting the finish you want before he gets to much done. The second purpose of sandblasting is to provide an anchor pattern to increase paint adherence. Epoxy paints work by mechanical adherence and will stick better to a gritted surface than a polished surface. The anchor pattern depends on the sands grit size. We use 35-70 (#40) sand.
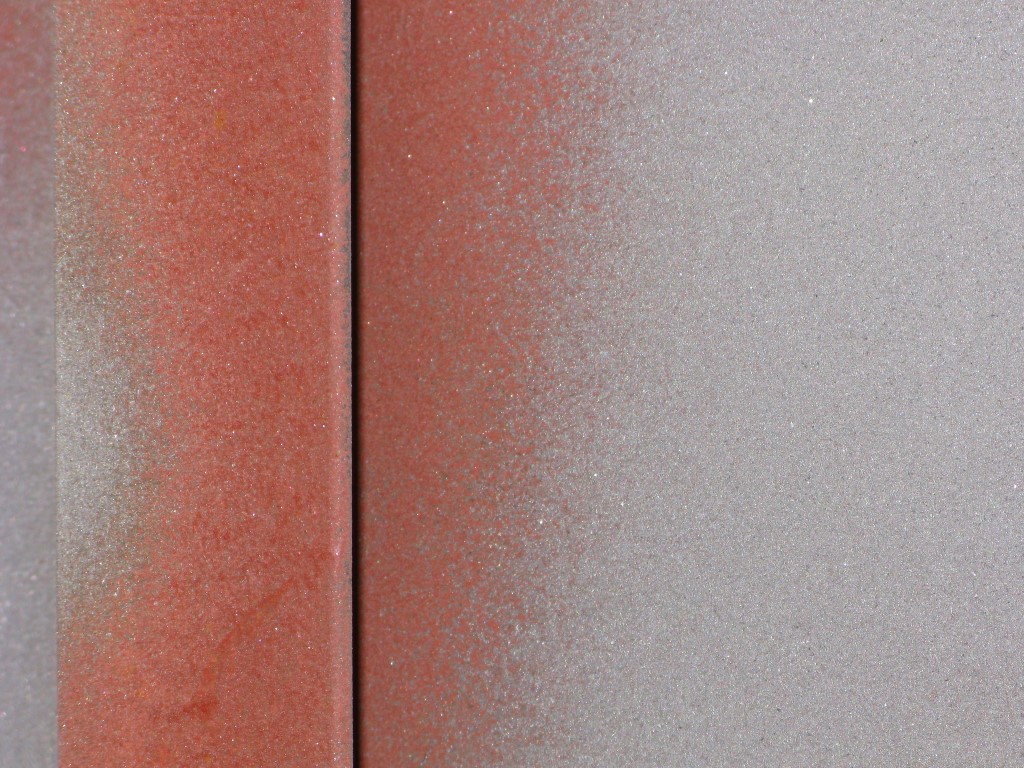
Steel sandblasted to white metal. This steel had been preblasted, shop primed and finally reblasted to get it’s final coating after all welding work was done.
The major drawback of blasting to white metal finish is that it takes serious equipment, time, a lot of sand and therefore is expensive to achieve. Like with any expensive job we want to do it as efficiently as possible. Before even I start talking of efficiency of set ups and results to expect, I have to mention the sandblasting charts provided by equipment manufactures, distributors and others. I still haven’t seen a chart that reflected the reality of sandblasting a boat (or any steel structure in a yard environment) for most backyard boat builders. I believe most charts are to reflect the highest capabilities of the equipment without economical efficiency considerations applied to specific applications and situations. Basically for each different situations the economical ratio of time vs quantity of sand to blast a same area is different. Let me explain this. As long as the equipment is sized properly, more sand per hour will blast more surface in less time. Less sand can be used with a same high air volume to achieve a same area but it will take more time. Twice the sand does not mean half the time.
If sand didn’t cost anything, it would be worth blasting a high volume of sand but at $6 for a 55lbs bag of sand, the amount used has to be taken in consideration. In a very well equipped shop, using a sand recycling system it would be worth blasting at the values given by charts, highest sand volume capabilities for the equipment. The costs of this highly equipped shop are energy, equipment amortization, over head and labour…not sand. They run with a lower efficiency on sand but highly efficient on time. For someone who owns the sandblasting equipment but no recycling system the main cost will be sand; he’ll want to use a minimum of it for a maximum of surface cleaned. Even though our sandblasting equipment owner will consider time, we can assume that the person who rents the equipment will be willing to use a bit extra abrasive to reduce the time paying for gear.
This said, the cost of both, sand and time can be reduced by adding as much energy as possible in each grit of abrasive; this is achieved by increasing the air volume. As I mentioned before, the more air volume your compressor can provide, the more efficient is your set up.
If I get back to my case scenarios, a contractor payed on an hourly rate plus abrasive, does not care much about either, the time or the amount of sand used therefore doesn’t have as much interest in the size of his compressor as the person paying him. So, as I said previously, when shopping for a contractor, it may be worth considering the size compressor he is using. Same applies for renting equipment.
Here are some numbers to compare with. Our neighbours (Terry, heavy machinery restoration) compressor puts out 250cfm at 100 psi. He minimizes his cost with a sand rate of 5 bags (275lbs) of sand per hour. After a few times using his equipment we found out that we were doing best for ourselves using a bit more sand: 7 bags (385lbs) per hour. We were paying Terry $55 per hour to use the gear and at that time sand was costing us $5 a bag. By increasing the flow of sand it turned out to cost us the same amount of money to blast a similar area, the difference was that we were doing it faster so the extra money spent in sand got saved in compressor rental cost. Bonus: the job was finished sooner.
So, with that set up, what did we get done in an hour? Here’s an other variable: toughness of the surface. What are we taking off? Tight mil scale? Loose mil scale? Rust? And mil scale doesn’t equal mil scale….surprisingly, the mil scale toughness isn’t the same on different thickness plates. On our new steel (44W), the scale on the ¼ plate was looser than on the 10 gauge. If you take a close look at different thickness plates you’ll even see that they’re different. With the same set up (250 cfm compressor, 100 psi, ~385 lbs of sand per hour) we would clean a ¼ inch plate, 5×10 ft in an hour, meanwhile we could only do a 4x8ft 10 ga sheet in the same time.
These painfully slow results are for blasting to white metal some brand new out of the mil steel. If you must deduce something from this surface toughness blurb, it’s that it is worth weathering your steel, letting the elements age your plate surface; you could cut your sandblasting time (and money) in half with not much effort. Saying that, don’t just stack a pile of plate out in the yard and forget it there. It is best to keep the plates vertical and with space between each. If you let a chance for water to sit on the plate you will discover some pits in your steel when you blast it: galvanic corrosion. As for the exterior of your boat hull, you can smile as you see it turn red and notice the black stuff flake off. While your hull is waiting for it’s final touch, a blast and paint, the elements are at work for you.
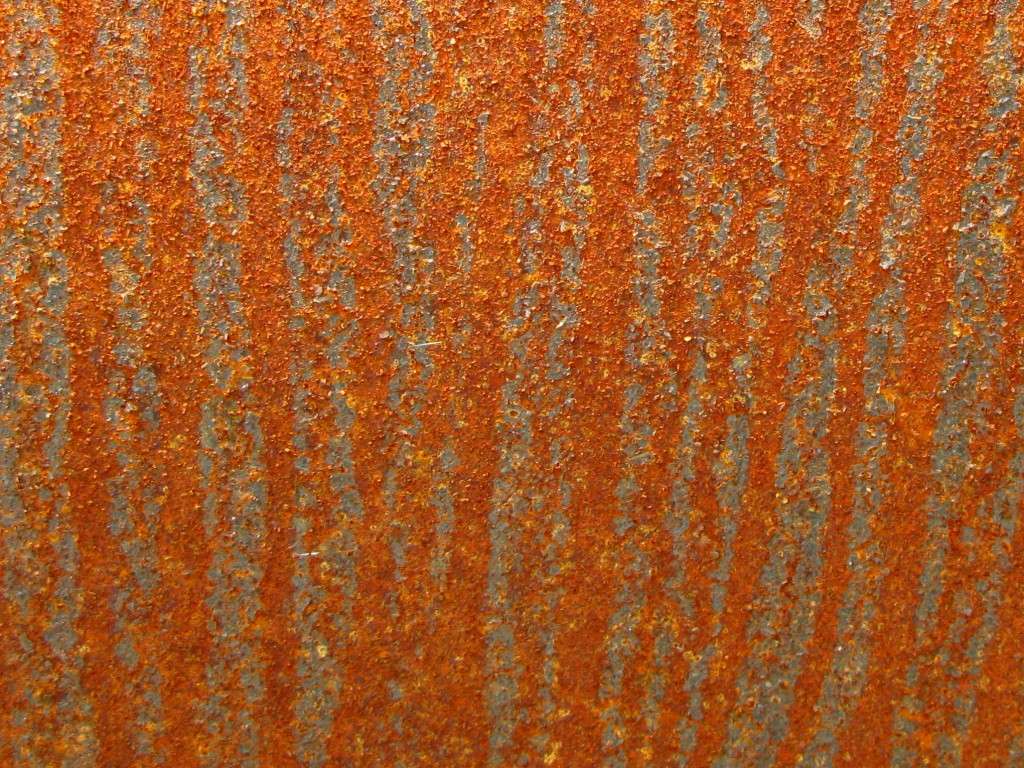
Weathered steel. The mil scale is scaling off making it for an easier sandblasting job.
I got a little carried away here. Back to what to expect when you want to sandblast or get your boat sandblasted. When I sandblast I always have this feeling I am trying to color the boat or plate with a big marker (but not big enough to make it feel right). Don’t worry if the after the first hour of sandblasting you feel like crying and wonder what you have gotten yourself into, that’s what it is supposed to feel like…even when you have done it many, many times. Eventually an automated survival function kicks in and, when you’ll be all done, you’ll be amazed by the strength and endurance a human being can pull out in a crisis situation.
More down to earth? The hourly cost of sandblasting, including sand should be in the range of $100 to $135 (in Canadian dollars and based on the cost of Sandblasting contractors in Eastern Ontario). A 55lbs of silica-free abrasive sand now cost $6 CDN (in 2009). With a well functioning system I wouldn’t expect to ever use over 8 bags of sand per hour, and this to clean to white metal a surface between 32 and 50 sq ft. If you or the contractor you hired does better, smile and keep it up; if you’re not in these ranges it may be costing you too much and something is not set as well as it could be.
A word about sandblasting media for inside the boat
We have used 4 different types of blasting media inside our boats
- “Black Magic” – Coal Slag – 30-60 grit
- Sorelmix – 30-60 grit http://smelko.com/?page_id=4135
- JetMag sand – 35-70 grit https://www.olimag.com/en/sandblast/
- Maxiblast – Iron Silicate – 30-60 grit http://www.groupebellemare.com/en/abrasives-minerals/products
We used the “Black Magic” on our first steel boat. I cant say too much about it as we had very limited experience back then and used less then ideal rental equipment. All I can recall is liking it better then the more sand-like media.
We did most of this boats interior with Sorelmix for the simple reason that it was the easily available, we purchased it from our neighboring truck restoration shop. To my non professional experience, the Sorelmix worked just as well as the black magic. All my previous information is using Sorelmix
Our neighbor eventually changed his sand to JetMag 35-70 and within the first time using it inside the boat, we found it way too dusty. While it was a fine blasting media to use outside, on the interior of the boat it made hell that much more hateful.
That’s when we were forced to explore different option which came down to trying the Jetmag in 30-60 grit or the MAxiblast (copper slag). What we were after is a no silica abrasive that would provide the appropriate anchor pattern for our paint and limited dust while sandblasting. Our first observation is that most abrasive sales brochures seem to praise there product as low dust (well then…) . I found it interesting that one blast media is praised for its low density for more blasting material (JetMag) and an other evenly praised for its high density carrying more energy (Maxiblast). We finally decided to give a try to the more expensive but most convenient (home delivery by the pallet with unloader) option; the Maxiblast – copper slag.
Wow!! With no hesitation I will say that the copper slag has been my favorite blasting media (particularly for the boats interior). It seriously produces less dust then the other medias we have used. This sand is so heavy that it falls straight down. It’s high density does make it more aggressive and it bounces off surfaces hard enough to blast a hard access surface (as behind tight frames). For the mil scale we still had left to remove, the maxiblast just ate it away. It is also the first blasting media we have successfully reused (when we could collect it clean); this said, we only blasted the reused sand on exterior surfaces as we feared the more broken down grit could be more dustier. The copper slag is more expensive then the jetmag sand but it is its worth in gold where excessive dust is an issue.
The jetmag sill works well on outside surfaces but you need to be willing to deal with a cloud of dust.
